Okra, often called Bhindi, is a prolific vegetable that rewards your gardening efforts with harvests yearly. A versatile and vitamin A-rich warm-season vegetable. Below we learn how to grow okra plants faster, the best tips to increase flowering, fruiting, and yield, and the okra growing stages.

How to grow okra plants faster
Choose the right site
Find the garden’s sunniest area. Okra is like the full, hot sun. A lack of sunlight will prevent it from flourishing and producing edible fruit. Growing okra successfully requires a spot exposed to direct sunlight for at least six hours daily. Don’t fret about the temperature being too high; okra thrives in the warmest part of July.
Make sure there are no mistakes while planting
Producing a successful crop of okra from seed is a breeze. It may grow even on poor soil and with some dryness, although its output can be diminished. Nail-file each seed gently and immerse it in regular water for a night before planting. Put seeds directly into the garden in early spring, when the soil is at least 60 degrees Fahrenheit for best results. Midway through the growing season, you can prune taller kinds to promote further development or plant a new crop for a later harvest.
It takes at least two weeks following the last frost date, and maybe more, for the soil to warm up sufficiently for direct planting outdoors in chilly places. You can start seedlings two months before the final spring frost. Since warm soil is necessary for germination, you may want to invest in a heat mat. Around the time the danger of frost has passed, you should transplant your seedlings outside. Okra doesn’t transplant well.
Therefore you can lose seedlings if you use this approach. Examine seed packs for plant height, width, and other information. You can better design your garden layout if you know that the tall varieties can grow to a diameter of four feet. Plant more seeds than you need, then choose the strongest plants to retain after thinning them out after they’ve developed their second set of leaves.
You can keep weeds at bay and help plants retain moisture by applying mulch around their bases. Apply a complete vegetable fertilizer twice daily throughout the growing season, as directed on the box. This plant is sensitive to temperature and moisture extremes, which can lead to the premature death of blooms, the loss of buds, and the failure to set pods. Maximize plant sunshine, provide shade and water during a heat wave, and cover seedlings if a late-season frost is a forecast.
In case you missed it: How to Grow Zinnias from Seeds: Guide and Steps to Propagation, Planting, and Care

Fertilize your okra plants well
Get a soil sample analyzed to determine how much fertilizer a crop needs. A soil test can tell you the ideal pH and fertility levels for your garden, so you can stick to them. Before planting, add 25–50 pounds of 10–10–10 or another fertilizer that provides 2.5–5 pounds of nitrogen, phosphorous, and potassium per 1,000 square feet if a soil test has not been performed.
A delicate equilibrium exists between vegetative growth (leaf production) and reproductive growth in the okra plant (pod production). To further control plant development and guarantee pod output, robust plants should wait until fruiting to add any extra nitrogen. A side dressing of 3 to 6 pounds of calcium nitrate (15. 5-0-0) per 1,000 square feet of okra, or 1 to 2 pounds per 100 feet of row, is recommended.
The first side-dressing should be done 3–4 weeks after planting, and the second one 6–8 weeks later. Whether or whether the okra will keep producing for its predicted lifespan after the first application of calcium nitrate depends on the weather. Extra nitrogen should be applied during the end of the growing season when flowers are concentrated at the plant’s crown.
Water your okra plants well
The garden has to be watered so that the product receives equal moisture. If you plan on using a hose or sprinkler to water your garden, do it first thing in the morning so the leaves can dry before nightfall. Drip irrigation systems provide an alternative to traditional watering methods like hoses and sprinklers.
These simple solutions save water and dry vegetation and apply precisely. Whatever technique is used, enough water must be applied to the garden to dampen the soil to 6 inches. If you water your plants lightly, they will develop shallower roots. When soil moisture is low, pod development and set are delayed.
Control pests and diseases of your okra plants
Okra is very resistant to most pests and diseases. Misshapen pods can be avoided by manually removing any stink bugs that show up. Possible pests include corn earworms, aphids, cabbage loopers, and flea beetles. A fungus called fusarium wilt may be a problem in warm climates. Yellowing and wilting leaves are signs of plant illness, signaling the need to uproot and dispose of the damaged plants.
The most effective preventative method is crop rotation. Fusarium wilt is a fungal disease that may develop in damp environments. The golden leaves will start to droop as a clear indicator. Infected plants must be eradicated to stop the spread of the disease. Another possible problem is anthracnose fungus, characterized by black patches on leaves.
Once again, you must eliminate any affected plants to stop disease development in your garden. Okra is susceptible to the fungus powdery mildew, which appears as white, powdery patches on the plant when grown in humid, damp environments. Whenever possible, plant in well-drained soil, remove afflicted parts and trim back plants to improve air circulation.
In case you missed it: How to Grow Peas Faster: Best Tips to Increase Flowering, Fruiting, and Production Yield

Harvest your okra plants a bit early
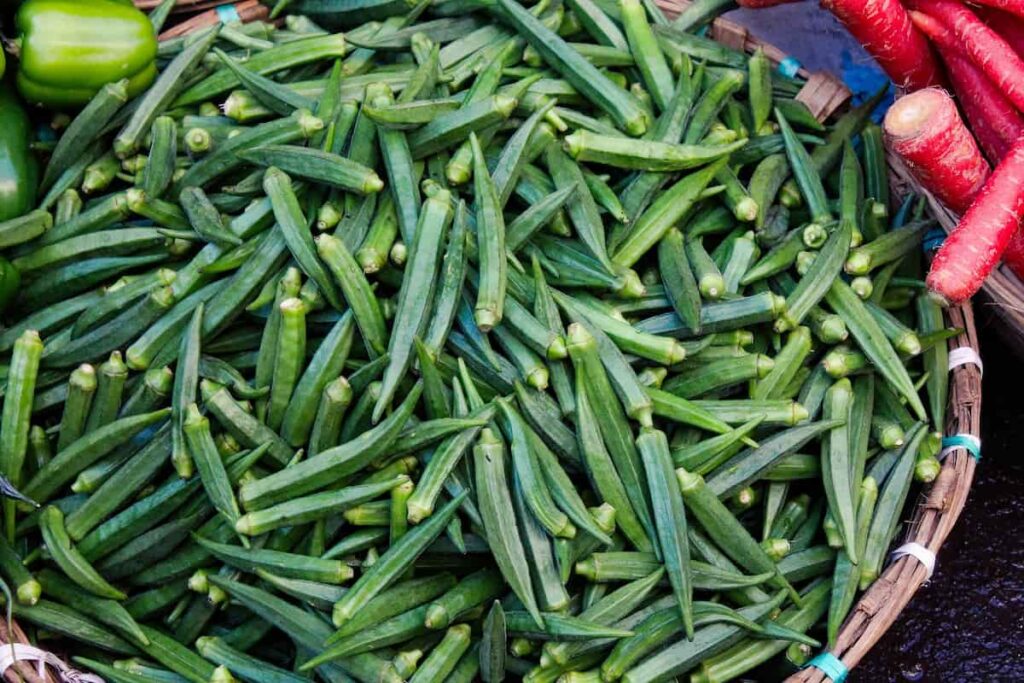
Okra pods are ready to be picked between 2 and 3 inches in length, often between 60 and 70 days after sowing. These pods are still young and delicate. Pods of okra three inches or more in diameter tend to be rough and fibrous. Okra types with round pods are great for slicing and freezing since their sensitive pods don’t toughen up as they get bigger. Okra is so abundant that 25 to 50-row feet can provide enough food for a household of four over many months.
Okra has to be picked at least once every two days since it rapidly develops. The plant’s overall output will suffer if you let the pods grow to maturity. You can pick okra by hand, but it’s best to use sharp tools like pruning shears or pocket knives to avoid damaging the plant. Okra pods are easily bruised, so treat them with care. If you keep your okra well-watered, fertilized, and plucked at the right time, you can reap its benefits for twelve weeks.
Okra pods may be left on the plant after harvesting is complete so the seed can dry up for use the following year. The dried pods and stems of the okra plant make lovely additions to floral bouquets and seasonal wreaths. When keeping fresh okra, humidity and temperatures between 45 and 50 degrees Fahrenheit are ideal. You shouldn’t wash okra before putting it in the fridge since it can hasten its spoilage. Good quality pods can be kept in the fridge for approximately seven days if picked, handled, not cleaned, and stored carefully.
Frequently asked questions about okra
What helps okra grow?
Select the sunniest area of your garden and hold off planting okra until it’s warm enough outside. Temperatures of 65 degrees at night and 85 degrees during the day are ideal for most plants. Northern gardeners can plant in late June since pods develop in 2 months. While it can tolerate pH levels up to 7.6, okra thrives on the soil between 6.5 and 7.0. Before planting, add compost or other organic materials to the soil.
The chances of a bountiful harvest can be increased by providing a steady supply of nutrients to the okra plants throughout the growing season using a slow-release fertilizer. The taproots of okra seedlings are quite delicate, so take care while handling them. An hour before planting, give your seedlings a good soaking. Remove seedlings gently and place them 10 inches apart. Put them in the ground about half an inch deeper than they were in their containers.
Miniature plants should be watered if rain is not forecast, but mulching should be delayed for a few days to let the soil warm up in the sun. Okra thrives better in dry circumstances than other vegetables, but it still requires an inch of water every week to grow. Bear in mind that okra is the last plant to die off if you encounter a prolonged dry season and find yourself unable to water enough.
In case you missed it: How to Grow Moringa Tree from Seeds in Backyard: Planting and Care in Winter

Why are my okra plants growing so slow?
Perhaps it was planted at the wrong time. Okra should be sown three to four weeks after the last spring frost to produce a substantial amount of fresh okra from a garden. Okra does not thrive if planted before the soil warms up and before nighttime temperatures average over 50 degrees Fahrenheit. Due to their shared ancestry, okra and cotton should be grown simultaneously.
Okra has to be picked often. If you want the best quality, harvest it before the pods harden. In warm temperatures, okra can reach full maturity in a few weeks. There are just around four days between blossoming and picking time. Picking okra daily is recommended. The length of the pods will often range from four to six inches. However, this may depend on the specific variety. Larger pods can be tested by slicing them open with a knife.
Hard to cut means they are too tough to be served. The plant will cease producing if the old pods are not removed. Okra is a self-pollinating plant. Thus it’s possible to reuse garden seeds from year to year. Keep some pods on the plant until they are completely grown and practically dry towards the end of the season. When okra pods are allowed to develop to full maturity on the plant, future harvests are severely reduced.
How many days does it take okra to grow?
In between 50 and 65 days, okra is ready for harvest. Ten to twelve weeks of production time is possible with these plants. It blooms and produces pods until the season’s first frost turns them black and destroys the plant. Once the okra flowers have faded, you can begin harvesting. The seed pods will be two to three inches long and pliable. The pods should be harvested at least once daily since they go from sensitive to tough extremely fast as they mature.
Be careful while working with okra. Pods are readily damaged. Eliminate spent seed pods to make room for fresh ones to form. Maximum fruit production can be achieved by removing the older branches directly underneath the pods when they are picked. Wearing gloves is recommended while harvesting any kind of okra due to the presence of spines. Even though the pods of spineless species have fewer spines, the rest of the plant still has spines. Therefore it’s best to protect your hands and arms with gloves and long sleeves.
Okra seeds must be soaked for 12-18 hours before planting to soften the tough seed coat. Soaking makes it easier for the seeds to absorb water and germinate. To avoid frost damage, sow okra seeds in the spring or early summer. A soil temperature of 65 degrees is ideal for preventing seed rot. Okra seeds should be started indoors in peat pots between four and six weeks before the region’s last frost date by gardeners who live in cooler climates.
In case you missed it: Growing Okra In Pots / Containers / Backyard

Okra plants should be purchased in ready-to-plant containers, such as peat pots. Plant development is stunted when okra’s roots are messed with. Cultivating okra to a height of three to six feet is possible. Find a position in the garden where its shadow won’t fall on anything that needs full light. Plant them one inch deep and three feet apart in rows. The seeds have a common germination time of between two and twelve days. Mulch and fertilize as necessary; okra may thrive in various soils.
After sprouting, thin seedlings to 12 to 18 inches, full, the intense sun is ideal for growing okra. Regular watering is essential while the plant is blooming and pod-forming. Deep weekly soakings are helpful during dry periods that last for weeks. Diseases can be reduced by crop rotation and effective soil management. Wilt, root-knot nematode and Southern stem blight threaten okra plants. Okra often attracts bugs like beetles and worms.
What is the best fertilizer for okra?
Okra productivity can decrease during the warmest and driest sections of the summer. Gardeners could attempt ratooning spring-planted okra if harvest drops and okra stops flowering. Cutting the plant’s stem encourages it to send up new growth and provide another harvest in the autumn; this technique is known as “ratooning.” Mowing or trimming okra to a height of 6 to 12 inches above the ground is recommended. After pruning, gardens benefit from a dose of fertilizer with a nitrogen-to-potassium ratio of 1:2 since this promotes new growth and blooming.
Fertilizers with a ratio of 1:2 include those with a ph of 4-0-8, 5-0-10, or 10-0-20. These materials should be applied as a side dress at a rate of 2 to 3 pounds per 100 feet of row, depending on the fertilizer used. Plants need regular watering after fertilizer, especially during the warmest portion of the summer. The ratooned plants can start bearing fruit in approximately 4 to 6 weeks, and the harvest will last until the first frost.
What can you not plant near okra?
The majority of gardeners see nematodes as helpful insects. However, these pests are bad for okra since they like munching on the tender young roots of the plants. Certain vine crops, such as sweet potatoes and squash, may increase the number of nematodes in the soil. Okra should not be planted in the same spot where a vine crop was cultivated the year before (except cucumbers and melons, which are compatible). Outside of this exception, okra doesn’t have many “bad friends.”
Because of its robust stems, okra may be a windbreak for more delicate plants like peppers. In addition to offering some shade from the scorching sun, okra plants are a great companion for lettuces since their thin roots won’t compete for the nutrients required by okra. As an annual that does well in heat, okra may be grown to provide shade for other plants that perform well in dappled light.
In case you missed it: Best Practices to Grow Okra at Home: Check How this Guide Helps Beginners

Along with okra, early plantings of cool-season crops like peas are recommended. So long as you plant your okra early enough, you won’t have to worry about the peas being overrun by the larger plants. Instead, simply remove the pea plants after harvesting all the peas to allow the okra to expand in size as the temperature outside rises.
Conclusion
45-50 days after planting, you should see your first harvest. Produce should be harvested when it reaches a height of two to three inches and then again every two days. You can use scissors or just pluck them from above the caps. It’s possible to make a second pod appear after cutting the first one. Never stop picking Okra until the plant stops producing it. It’s as simple as ensuring a constant harvest of okra for your kitchen and yard.
- Broccoli Varieties: Choosing the Right Cultivars for Your Farm
- How to Raise Pigs in Your Own Backyard: A Comprehensive Guide
- Budget Friendly Sheep Shed Ideas: Cheap and Low-Cost Tips
- How Much Do Cattle Farmers Make: Revenue Streams in Cattle Farming
- Management Pests and Diseases in Your Cotton Field
- Sheep Farming Business Plan for Beginners
- Aquaponic Farming at Home: A Step-By-Step Guide
- Profitable Village Farming Business Ideas in 2024
- High-Yield Aquaculture: Fast-Growing Fish for Farming
- Effective Fish Pond Construction Techniques for Beginners
- Irrigation and Water Management in Pineapple Farming
- Blossom to Harvest: Mastering Flowering and Pollination in Papaya Farming
- Pig Fattening Essentials: From Selection to Sale for Beginners
- Raising Wagyu Cattle: A Complete Guide for Premium Beef Production
- Soil Types and Their Water Holding Capacity
- Optimizing Irrigation Schedules for Coconut Groves for Enhanced Yield
- Espresso Your Garden: Coffee Grounds for Healthier Acid-Loving Plants
- The Best Soil Mix for Snake Plants: How to Mix Your Own Snake Plant Soil
- Green Thumb Success: Expert Tips for Cultivating Greenhouse Beans All Year Round
- Bloom All Year Round: The Ultimate Guide to Indoor Hyacinth Care
- Eco-Friendly Gardening: How to Make Liquid Fertilizer from Kitchen Waste
- Ultimate Guide to Grow Anise in Pots: Explore Seed Propagation to Harvesting
- Guide to Raising Chester White Pigs: Discover Breed Facts to Growth Management
- Mastering the Elegance: The Ultimate Guide to Weeping Cherry Tree Care, Planting, and Maintenance
- Ultimate Guide to Planting Garlic in Grow Bags: Growing Strategies for Beginners
- How to Fix Spider Plant Leaf-Related Problems: Natural and Organic Remedies
- 10 Reasons Why Your Tulsi Plant is Shedding Leaves: Home Remedies and Solutions
- Optimizing Growth and Yield: The Advantages of Palm Bunch Ash Fertilizer
- Utilizing Neem Oil Extract as a Natural Pesticide for Hydrangea
- From Soil to Harvest: Various Ways in Which Farmers Can Use AI Tools
- Steps to Encourage and Induce Citrus Flowers: A Comprehensive Guide
- How to Fix Snake Plant Leaf-Related Issues: Natural and Organic Remedies
- Transform Your Garden into a Fragrant Oasis with Raat Ki Rani (Night Blooming Jasmine)
- Discover the Ideal Chicken Breeds for Philippine Farms
- How to Create a Poultry Egg Farm Business Plan for Profits
- Grow Lemon Cucumbers Like a Pro: Insider Techniques for Bountiful Yields
