Food crops such as potatoes are among the most important in the world. In India, Potato is a temperate crop grown under subtropical conditions. Since more than 300 years ago, Potato has been cultivated in the country as a ‘poor man’s friend. This crop has become a popular vegetable crop in this country.
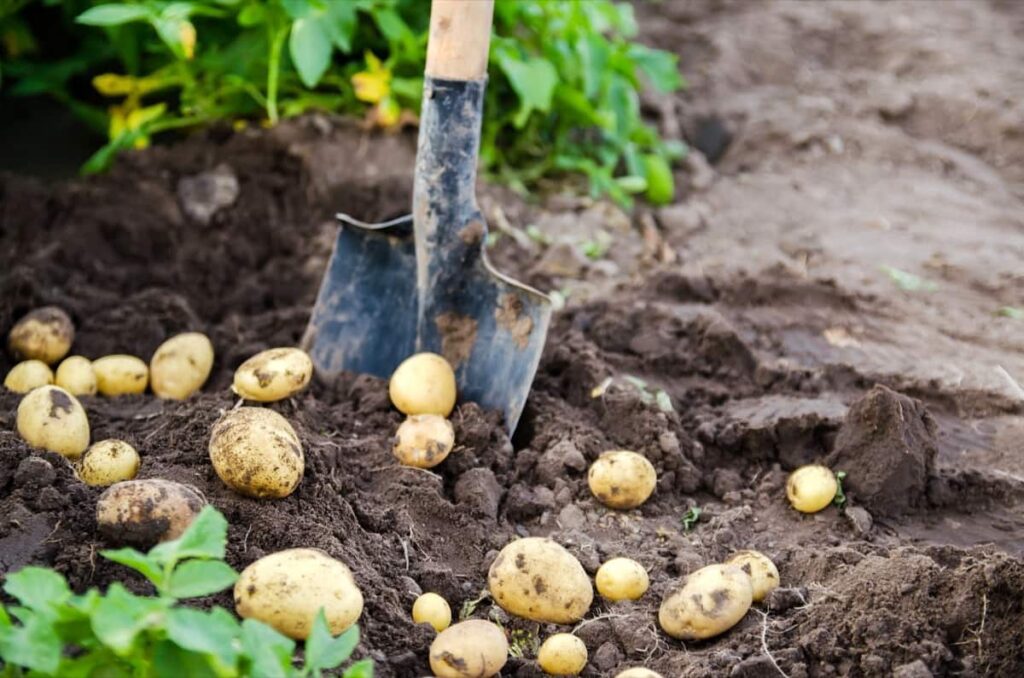
Potato is an economical food source; they provide low-cost energy to the human diet. In addition, potatoes are a rich source of starch, vitamins, especially B1 and C, and minerals. They also contain many essential amino acids like leucine, tryptophane, isoleucine, etc. The Potato, which originated in South America, is today grown all over the world.
Potatoes are used in various cuisines, chips, and for industrial purposes such as the manufacturing of starch and alcohol. In India, potatoes are grown almost everywhere. However, the major potato-growing states are Himachal Pradesh, Telangana, Punjab, Uttar Pradesh, Madhya Pradesh, Gujarat, Maharashtra, Karnataka, West Bengal, Bihar, and Assam.
Growing Potatoes organically in Telangana
How the Telangana government supports organic farming
Soil Health Management is one of the most important interventions under NMSA. SHM aims to strengthen the soil and fertilizer testing facilities to provide soil test-based Agricultural related schemes in Telangana recommendations to farmers for improving soil fertility and ensuring quality control requirements of fertilizers, bio-fertilizers, and organic fertilizers.
It also promotes the upgradation of skills and knowledge of soil testing laboratory staff, extension staff, and farmers through training and demonstrations, promoting organic farming practices, etc. Telangana Organic Certification Authority (TOCA) in the State gives organic certification to farmers and trade bodies.
In case you missed it: How to Grow Potato Plants Faster: Best Tips to Increase Flowering, Fruiting, and Yield

TSSOCA inspects and certifies agricultural products and food processing by assessing the conformity of products with NPOP standards and other international standards. It gives the certification after inspecting the farm field every year from the date land was registered. So even during the conversion period, the farmer has to get a certificate for each year.
Soil requirement for organic Potato farming
It grows in various soils, including sandy loams, silt loams, and clays. It produces the best yields when grown on well-drained sandy loams or medium loams with high organic content. Acidic soil, however, is not a barrier to their growth. Waterlogged soil is not suitable for its growth. It is also not advisable to cultivate potatoes in saline or alkaline soils. Ideally, the pH of the soil should be between 5.2 and 6.4.
Climate requirement for organic Potato farming
Potatoes grow under various climatic conditions despite being a temperate climate crop. As a result, it can only be grown under moderately cool conditions during the growing season. A temperature of 24°C is optimal for vegetative growth, while 20°C is ideal for tuber development. As a result, potatoes are usually grown in the hills as a summer crop, while they are grown in tropical and subtropical regions as a winter crop. An altitude of 3000 m above sea level is possible for the crop to be grown.
Time of sowing for Potato cultivation
The timing of planting is crucial for obtaining a good yield. The best time to sow early-season crops is September 25th and October 10th. It is best to sow medium-duration crops in the first week to the third week of October. While sowing, late-season crops should be completed between October 3rd and November 1st. It is best to plant during the spring season in the second fortnight of January.
Seed selection and seed rate for Potato cultivation
Planting tubers are the most common method of cultivating Potatoes. A successful crop depends on the cultivars’ purity and the seed tubers’ health. Potato seed tubers, however, are the most expensive input. It is important that tuber seeds are disease-free, well-sprouted, and weigh 30-40 grams each. Therefore, it is recommended to plant the entire seed tuber. Due to mild temperatures, hill tuber seeds are split into small pieces and planted late in winter.
Sprouting uniformly and reducing the cost of seed are the main objectives of cutting large-size tubers. Transversely cut tubers should be around 30-40 grams in weight and cut longitudinally through the crown eye. Typically, the seed is a small-size tuber with 8-10 quintals of seed, a medium-sized tuber with 10-12 quintals of seed, and a large-size tuber with 12-18 quintals of seed. Ensure disease-free seed production by using whole seeds.
In case you missed it: How to Start Sweet Potato Farming in Asia: A Guide of Cultivation for Beginners
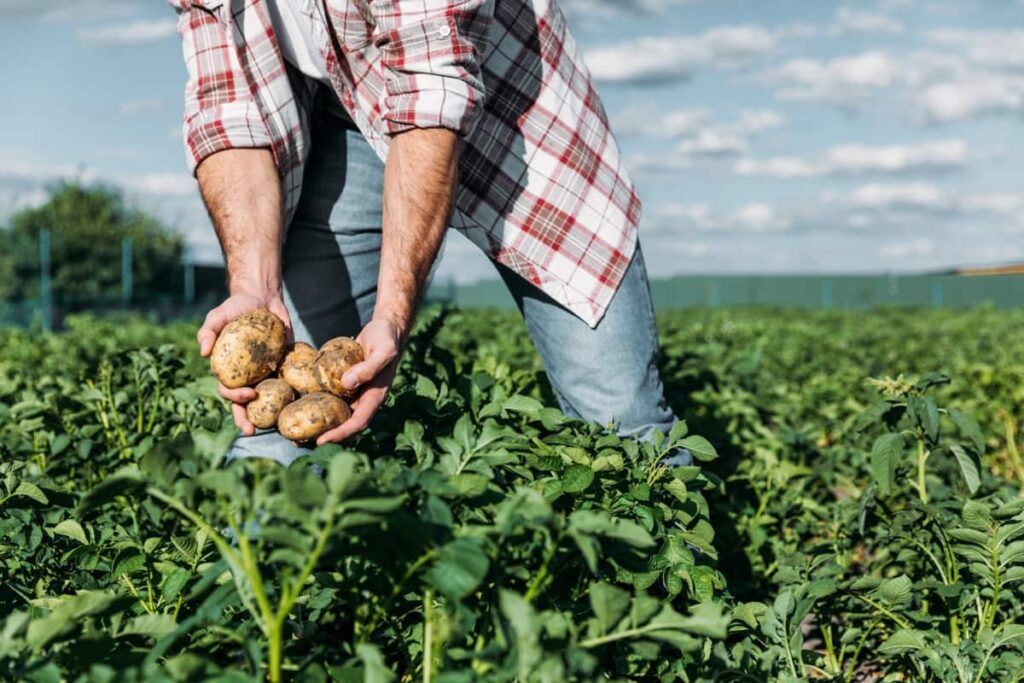
Planting potatoes in the main field
The seed potatoes should be planted after the last spring frost has passed. You should cut potato pieces 1-2 days before planting if you want to plant them. As a result of this process, both rot resistance and moisture retention are achieved. The bottom of the trench should be mixed with organic compost or rotted manure before planting. Growing potatoes in rows are the best option.
Prepare a trench 6-8 inches deep, and plant each piece of Potato every 12-15 inches, with each row 3 feet apart. You can decrease the spacing between plants if you have a small area or want to grow baby potatoes. Allow the plants to grow and continue filling the trench. Continue to mound the soil around the plants as they grow. Make sure to cultivate the soil once more before planting. The potato plant can become established more quickly by removing the weeds and loosening the soil.
Irrigation requirements for Potato cultivation
Depending on the soil moisture present, irrigate the field immediately or 2-3 days after planting. Light and frequent irrigation give the best result. Avoid flood irrigation as it will cause rot disease. Three to four hours of irrigation is required for medium to heavy soils, whereas for sandy soils, 8-12 hours of irrigation are necessary. Second irrigation should be done within 30-35 days after planting, depending on soil moisture. Remaining irrigation should be given as per the soil and crop need requirements. Stop irrigation 10-12 days before harvesting.
Weed control in Potato cultivation
A potato crop develops a canopy about four weeks after planting, so weeds must be controlled by then to gain a competitive advantage. Therefore, before ridging operations begin, large weeds should be removed. Weeds between the plants and at the top of the ridge should be removed mechanically or with herbicide after earthing. It is possible to weed manually; however, it is an expensive process. To accomplish this, a three-tine animal-drawn cultivator is used to cover one hectare per day.
Manure application in Potato cultivation
- Application of vermicompost at 200 quintals/acre at the time of land preparation
- Application of neem cake at 500 kg/acre at the time of land preparation
- Application of biofertilizers like Azospirillum and Phosphobacteria at 10 kg each/acre at the time of land preparation
- 60 days before planting, green manure with lupin should be applied
- Application of well-decomposed farm yard manure at 20 tons/acre at the time of land preparation
- Spraying cow pat pit 2 kg/acre in 100 liters of water on the 45th, 60th, and 75th day after planting
In case you missed it: Growing Potatoes Organically in Uttar Pradesh: Varieties, Cultivation Practices, and Production Management
Major pests in Potato cultivation and their organic control
Aphids
Symptoms
- The leaves are smaller and not opening properly when they are damaged.
- Shoots can wilt and dry out in severe infestations.
- Black sooty mold grows from sugary liquid secreted by aphids.
- It can also affect how leaves absorb sunlight by covering the surface.
Organic control and management
- On the 45th, 60th, and 75th day after sowing, spray 10% nettle leaf extract onto the leaves
- On the 45th, 60th, and 75th day after sowing, spray 10% Garlic-Chilli extract on the leaves
- Foliar spray of 3% neem oil
White grubs
Symptoms
- A grub feeds initially on rootlets/roots and then on tubers.
- In the first stage of development, the grubs feed on live roots, whereas in the second and third stages, it makes holes in the tuber that are large, shallow, and circular.
- Damaged tubers have irregular holes caused by white grubs. In many tubers, more than two holes can be found. White grubs cannot live in these holes since they are not so deep.
Organic control and management
- Plows in the summer to expose pupae and adults
- Light traps should be installed between 7 and 9 p.m. in April – May
- In the morning, handpick the adult beetles
- Between July and August, hand pick the 3rd instar grubs
In case you missed it: Growing Spinach Organically in Telangana: Cultivation Practices and Production Guide
Potato tuber moth
Symptoms
- Tubers and foliage are both affected by potato tuber moths.
- In the field or storage, larvae eat their way into tubers.
- A severe infestation usually occurs in storage, causing irregular galleries and tunnels deep inside the tube.
- Boreholes often contain larvae feces.
- Larvae attack a potato plant’s stems and leaves on the foliage.
- Insects consume the inside of leaves and leave only a dried-up outer layer.
- Infestations are common in the same areas, but yield losses are generally low.
Organic control and management
- Plant tubers deep rather than shallowly. Plant the tubers at a depth of 10 – 15 cm
- Pheromone traps should be installed at a rate of 20 traps per hectare
- After planting, earth up the exposed tubers at 60 days to prevent egg laying
- Spray 5% neem seed kernel extract on the leaves to prevent foliar damage
Diseases in Potato cultivation and their organic control
Alternaria
Disease symptoms
- There are often concentric rings on the leaves caused by Alternaria lesions.
- It starts as a small black or brown spot on lower leaves, then coalesces a few weeks after emergence.
Organic control and management
- Select a late-season variety with lower susceptibility to early blight.
- During cloudy weather, irrigation should be timed to minimize leaf wetness and allow leaves to dry before nightfall.
- Avoid nitrogen and phosphorus deficiency.
In case you missed it: How to Start an Organic Vegetable Farming in Telangana: Business Plan, Crops, and Subsidy
Late blight
Disease symptoms
- This disease causes leaf, stem, and tuber damage. Infected leaves appear blistered as if scalded by hot water and eventually rot.
- Drying out causes leaves to turn brown or black. In addition, spots appear on the underside of flour-covered leaves when infections are still active.
- Stems affected by this disease begin to blacken from their tips and eventually dry out.
Organic control and management
- Seed tubers from disease-free areas should be used to prevent the spread of pathogens.
- Plant material infected in the field should be appropriately destroyed.
- Plant resistant varieties such as Kufri Navtal.
Bacterial wilt
Disease symptoms
- Plants infected with the disease begin to wilt, starting from the tips of the leaves or where the stems branch out, spreading throughout the plant.
- The leaves turn yellow at their bases, and the whole plant wilts and dies. It is common to see a brown ring on stems when cut.
- Cut a tuber in half, and you will see black or brown rings. These rings will exude a thick white fluid when squeezed or left for a while.
Organic control and management
- Use pathogen-free tubers.
- Apply lime (dolomite) in the soil as acidic or alkaline soil is not conducive to the bacterial wilt pathogen.
- Apply neem cake at 80 Kg/acre
In case you missed it: How to Create Productive Flower Garden: A Complete Guide for Beginners
Potato crop harvesting
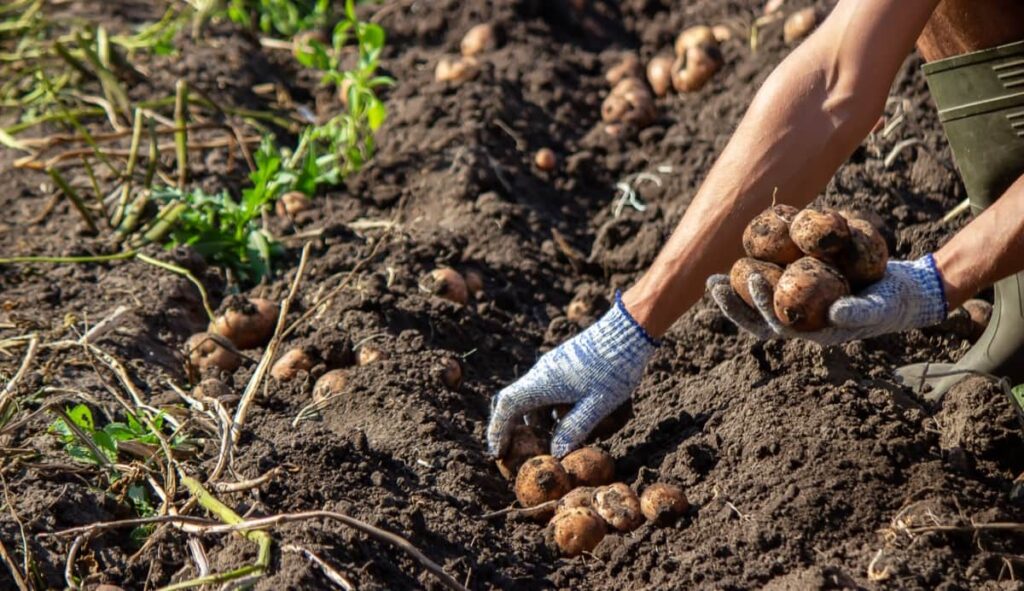
Potatoes are very sensitive to the time of harvest. Until the vines die, the tuber continues to develop. After planting, the main crop usually is ready for harvest between 75 and 120 days after it is sown, depending on the area, soil type, and variety. The crop should be harvested in the hills when the soil isn’t very wet.
Lifted tubers during the monsoon have poor keeping quality and develop various types of rot. In most cases, the main crop is ready for harvest when the leaves turn yellow-brown. During this stage, the tops are cut near the ground. It takes 8-10 days for the potatoes to be dug out of the field by plowing.
To cure the skin, the harvested potatoes are dried on the surface and piled in heaps for 10-15 days in the shade. Direct sunlight should not be used to expose the tubers since they become green when exposed. Ensure that all damaged or rotten tubers are removed. Before putting the product on the market, it should be kept in a cool place. Depending on the variety, the yield varies. In 120 days, early-maturing varieties produce an average yield of 6 to 8 tons/acre.
In case you missed it: Profitable Organic Eggplant/Brinjal Cultivation in West Bengal: A Production Guide for Beginners
Conclusion
Short-term agriculture crops such as potatoes are among the most profitable. Growing potatoes is a lucrative business; you can make money from it. Potatoes account for more than half of global vegetable production every year. This high demand for potatoes makes potatoes a profitable business for farmers.
- Sheep Farming Business Plan for Beginners
- Aquaponic Farming at Home: A Step-By-Step Guide
- Profitable Village Farming Business Ideas in 2024
- High-Yield Aquaculture: Fast-Growing Fish for Farming
- Effective Fish Pond Construction Techniques for Beginners
- Irrigation and Water Management in Pineapple Farming
- Blossom to Harvest: Mastering Flowering and Pollination in Papaya Farming
- Pig Fattening Essentials: From Selection to Sale for Beginners
- Raising Wagyu Cattle: A Complete Guide for Premium Beef Production
- Soil Types and Their Water Holding Capacity
- Optimizing Irrigation Schedules for Coconut Groves for Enhanced Yield
- Espresso Your Garden: Coffee Grounds for Healthier Acid-Loving Plants
- The Best Soil Mix for Snake Plants: How to Mix Your Own Snake Plant Soil
- Green Thumb Success: Expert Tips for Cultivating Greenhouse Beans All Year Round
- Bloom All Year Round: The Ultimate Guide to Indoor Hyacinth Care
- Eco-Friendly Gardening: How to Make Liquid Fertilizer from Kitchen Waste
- Ultimate Guide to Grow Anise in Pots: Explore Seed Propagation to Harvesting
- Guide to Raising Chester White Pigs: Discover Breed Facts to Growth Management
- Mastering the Elegance: The Ultimate Guide to Weeping Cherry Tree Care, Planting, and Maintenance
- Ultimate Guide to Planting Garlic in Grow Bags: Growing Strategies for Beginners
- How to Fix Spider Plant Leaf-Related Problems: Natural and Organic Remedies
- 10 Reasons Why Your Tulsi Plant is Shedding Leaves: Home Remedies and Solutions
- Optimizing Growth and Yield: The Advantages of Palm Bunch Ash Fertilizer
- Utilizing Neem Oil Extract as a Natural Pesticide for Hydrangea
- From Soil to Harvest: Various Ways in Which Farmers Can Use AI Tools
- Steps to Encourage and Induce Citrus Flowers: A Comprehensive Guide
- How to Fix Snake Plant Leaf-Related Issues: Natural and Organic Remedies
- Transform Your Garden into a Fragrant Oasis with Raat Ki Rani (Night Blooming Jasmine)
- Discover the Ideal Chicken Breeds for Philippine Farms
- How to Create a Poultry Egg Farm Business Plan for Profits
- Grow Lemon Cucumbers Like a Pro: Insider Techniques for Bountiful Yields
- Ultimate Guide to Caring for Your Pink Princess Philodendron: Tips for Thriving Variegation
- Areca Nut Profit Per Acre: Calculating Yield and Cost of Cultivation
- How Kaveri Chicken is Becoming a More Profitable Breed in Indian Backyards
- Transform Your Barn: 9 Steps to Convert a Horse Stall into a Chicken Coop
- Exploring Suffolk Sheep Disadvantages with Limitations and Challenges
